Installation
If you need help beyond this tutorial please join our support server and the support team will be happy to help you https://discord.gg/cnUpwrnpYb
Self Hosting Tutorial: https://taaku18.github.io/modmail/local-hosting/
What you'll need:
An internet connection and browser.
An email account.
A digital or physical notepad (Notepad, Notes, ... literally anything).
1. Heroku Account
In this guide, we will be using Heroku to deploy our Modmail bot. Make an account on their website to get started.
2. Discord Bot Account
2.1. Create a bot
You will need to create a bot application to interact with the Discord API. Head over to the applications page. Log in - if you're not already - and click on New Application. Give it a name and click Confirm to register your bot.
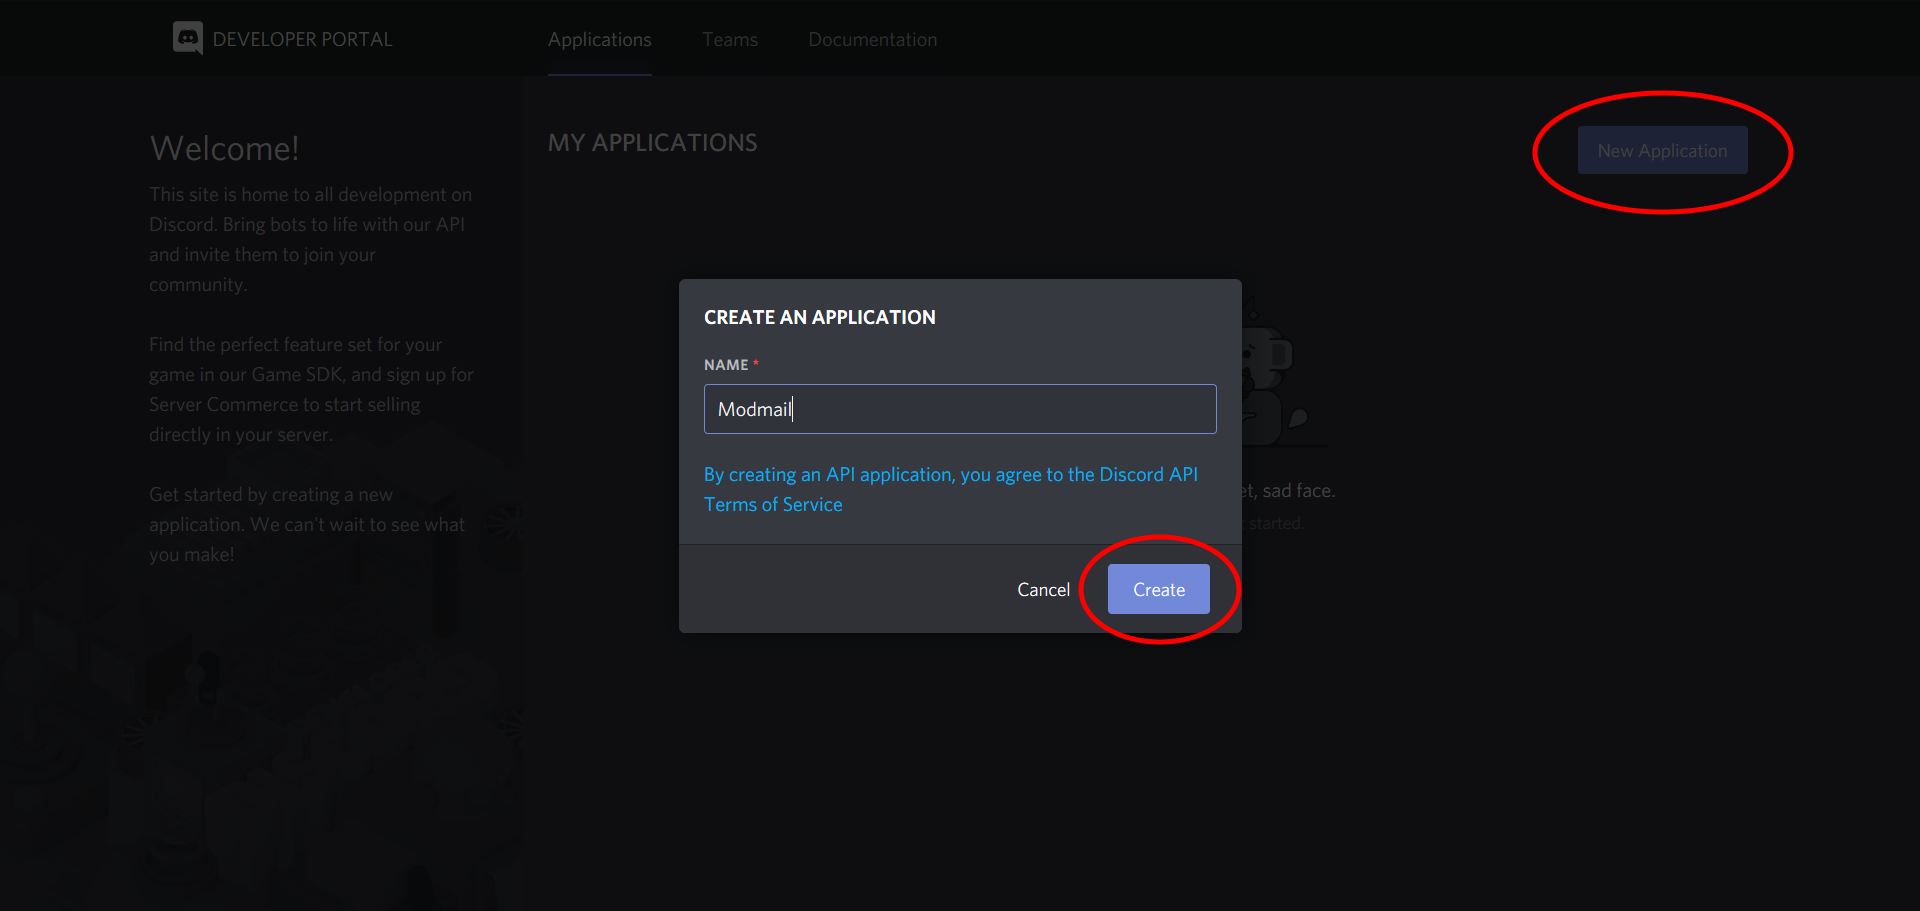
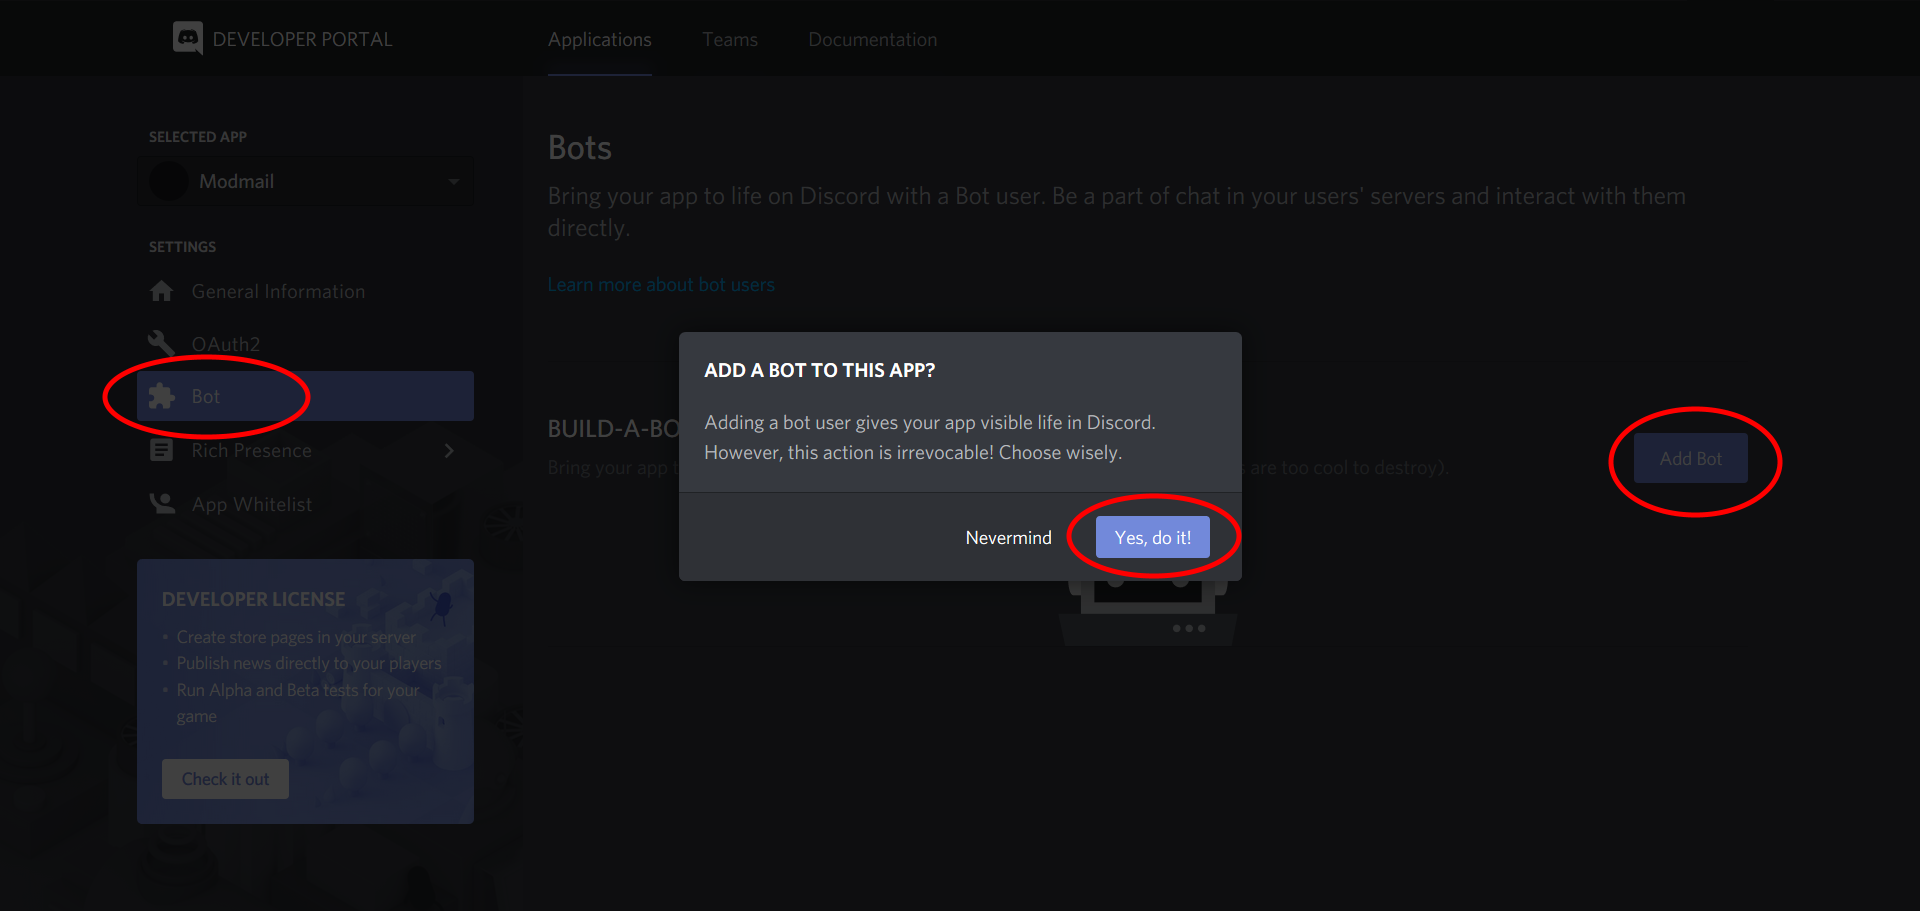
A new screen should pop up. Navigate to the Bot section and click on Add Bot. Click on Yes, do it! to confirm.
2.2. Obtain a token
After this, a dashboard for your bot will open. Give your bot a nice profile picture if you want to. It's recommended you switch off the Public Bot option. That way, no one except yourself will be able to add this bot to their server. Lastly, copy the token and paste this in your notepad.
Make sure to keep this token private, since anyone who has it can control (or "hack") your bot and potentially cause malicious damage. If you feel that your token has been leaked, click on Regenerate to invalidate the old one and create a new bot token.

2.3. Enable Privileged Intents
Enable the "Presence Intent", "Server Members" and "Message content" intent within the dashboard.

2.4. Get an invite link
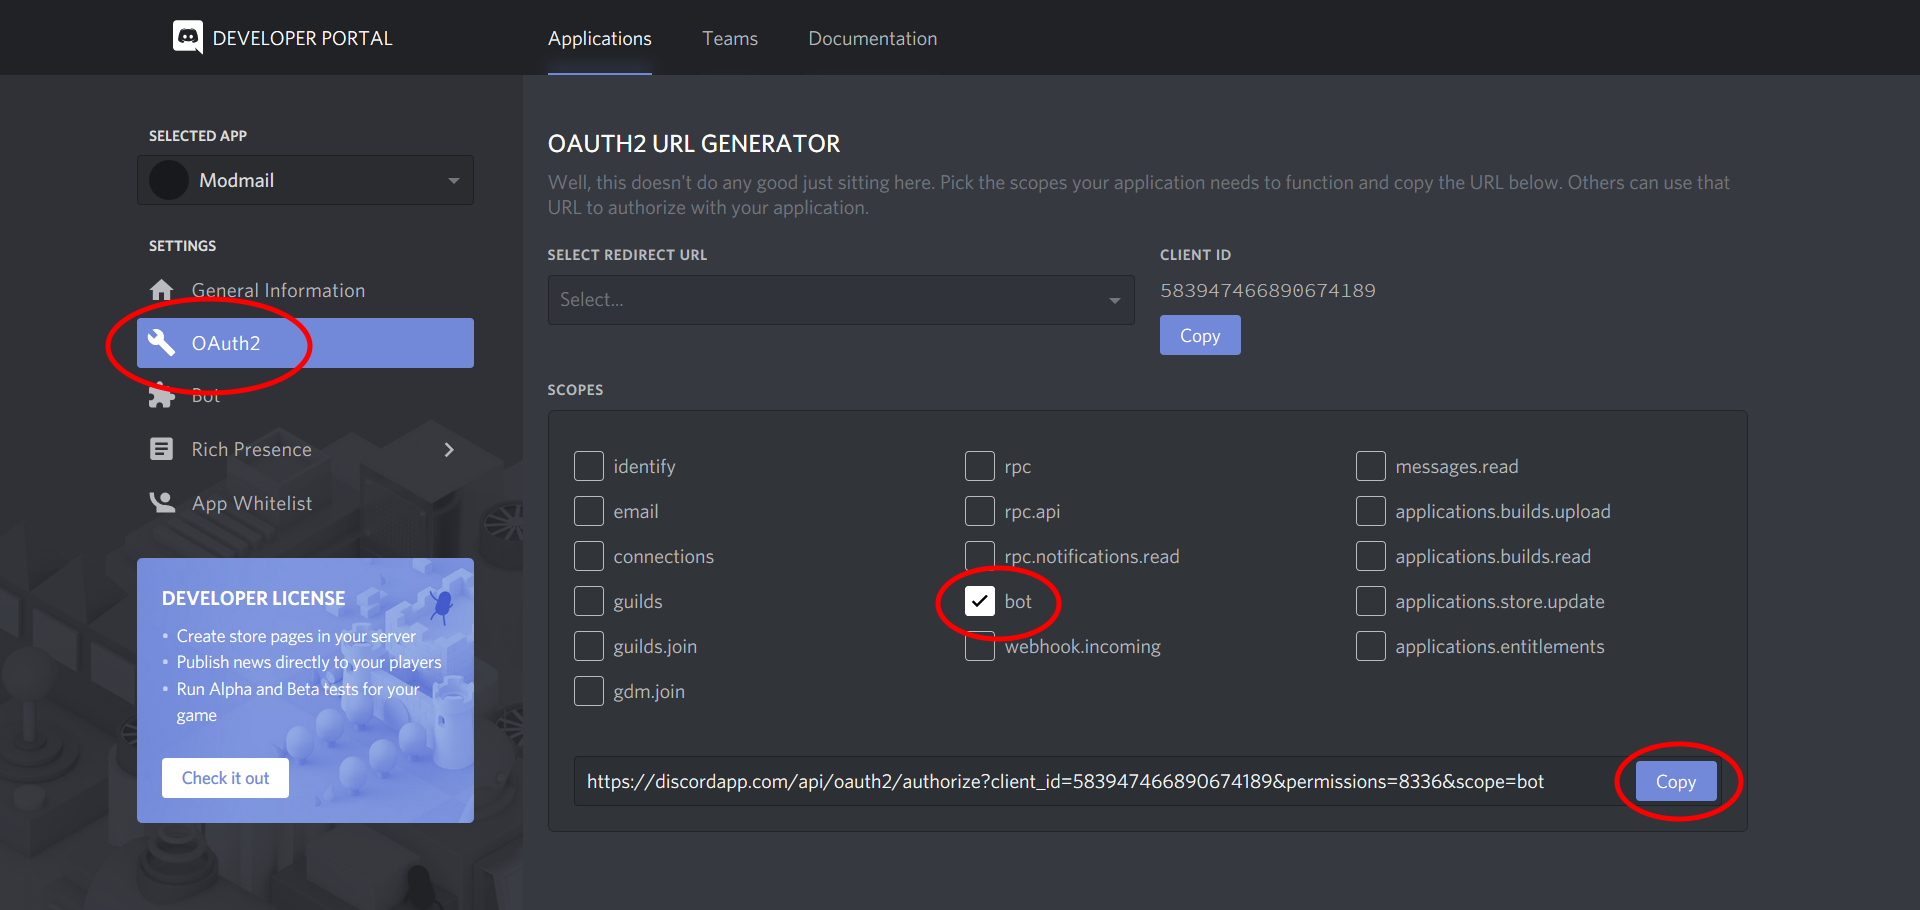
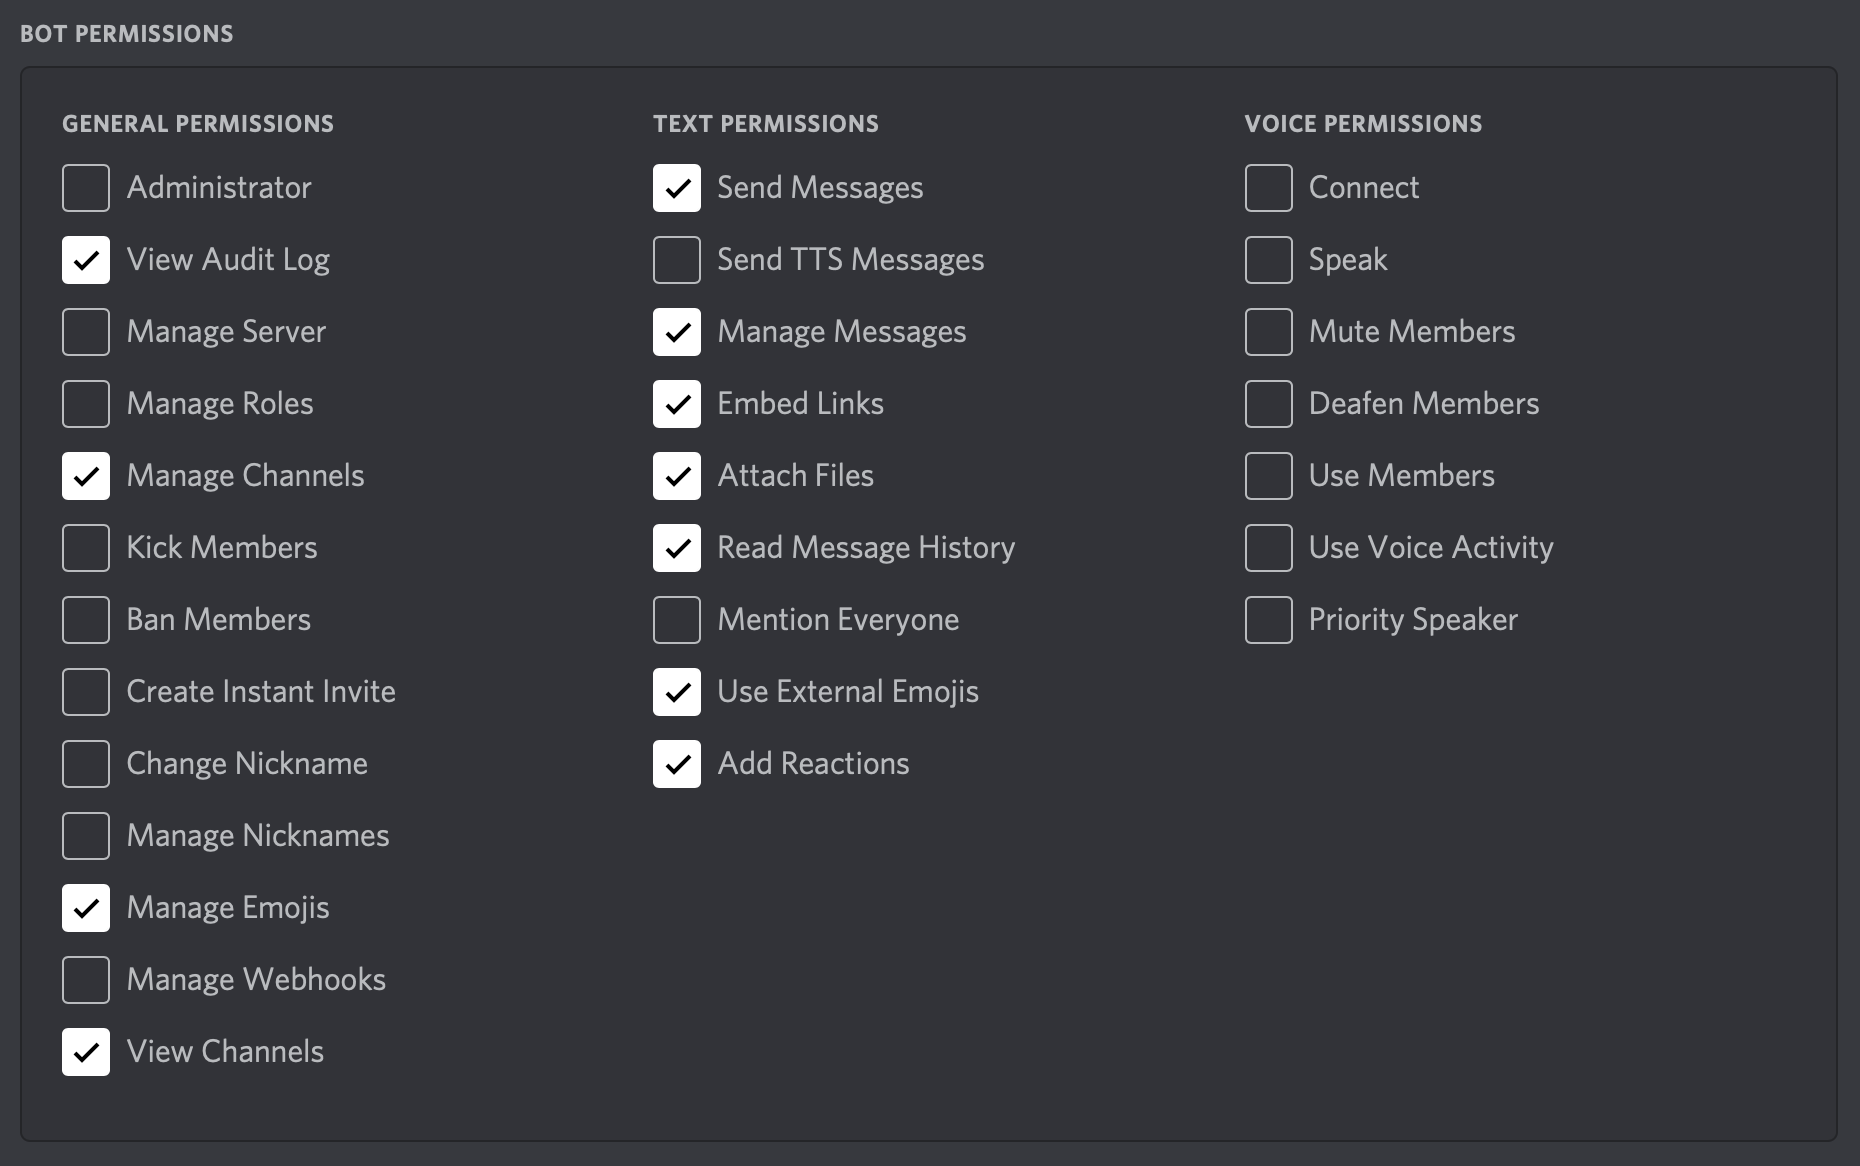
The last thing you need to do in Discord's developer portal is to obtain an invite link for the bot. To do this, head over to the OAuth2 tab. Scroll down a bit and select the Bot section. Scroll a bit further down and you will see a few permissions. Make sure to select View Audit Log, Manage Channels and Manage Messages.
Before you press "copy", scroll down and select the following permissions:
2.5. Invite the bot
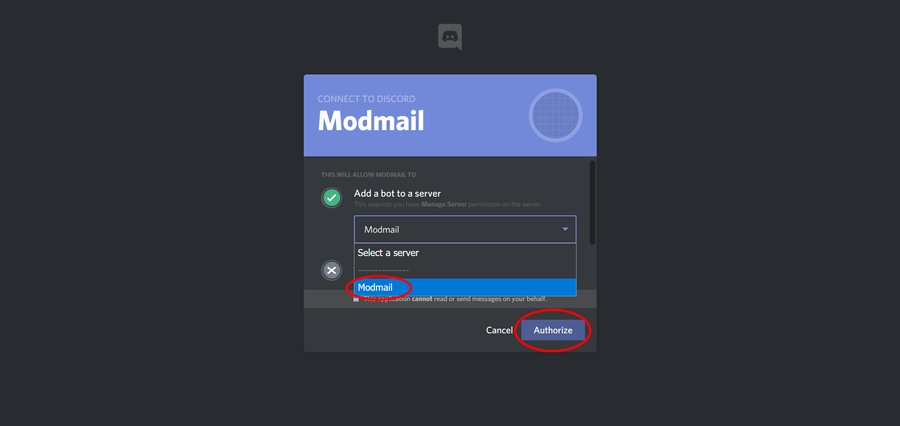
Copy the link and paste it in your address bar. A new screen will open: choose your server and select all options. Click on Authorize and your bot should be offline in your server.
To continue the setup, head over to the second page of this guide.
Last updated